Simple CSV server
This tutorial describes setting up a study in a simple php server. We will use the simple-minno-server which is a rudimnetary and easy to install server for MinnoJS. We will install it on a AwardSpace which is one of many services offerering free php servers.
I recommend following allong this tutorial by performing each action as we go. The practical experience gained this way is a lot more effective than the theoretical knowledge gained by just reading along.
Before beginining the installation, you should set up an account on AwardSpace. You should also download the files from the simple-minno-server, which can be found here.
Setting up a subdomain
After setting up your account, you can start creating your study. The first page that you see when you log into your account is the dashboard. You can always get back here using the navigation bar at the top of the screen (Image 1 a).
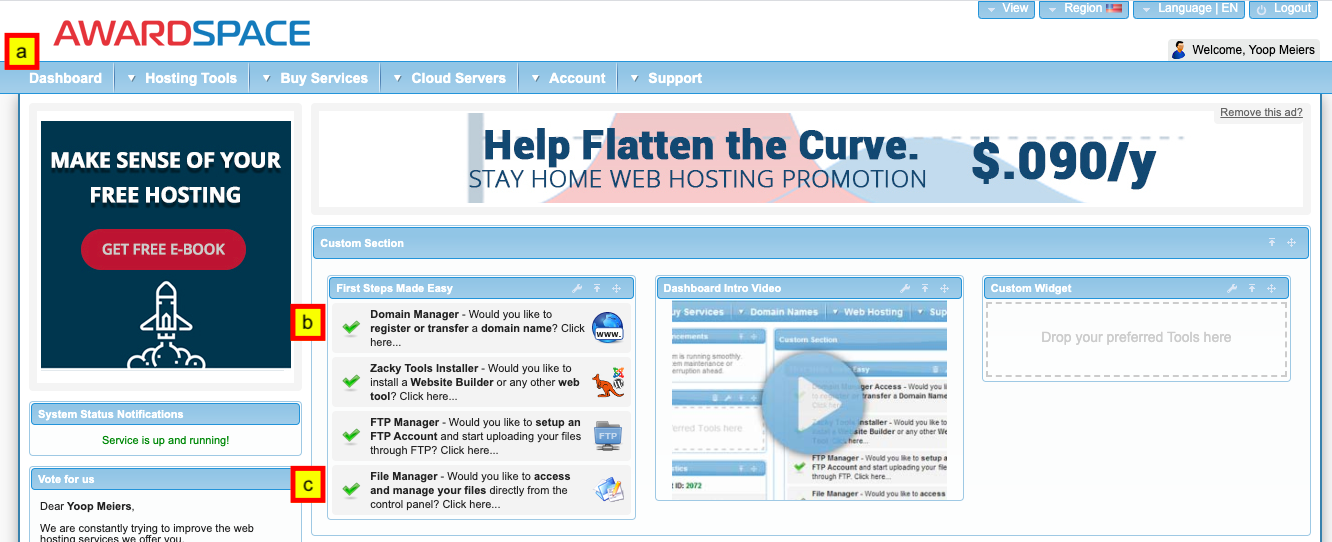
Image 1: the dashboard
In AwardSpace, you need to create a subdomain before you can start uploading your files, let’s do that first. Go into the domain manager (image 1 b), and choose “Create a Free Subdomain” (image 2 a). In the text input (image 2 b), choose a name for your server. We chose “minnojs-simple”, so that the URL for our study will be http://minnojs-simple.atwebpages.com/. And finally click “Create” (image 2 c).
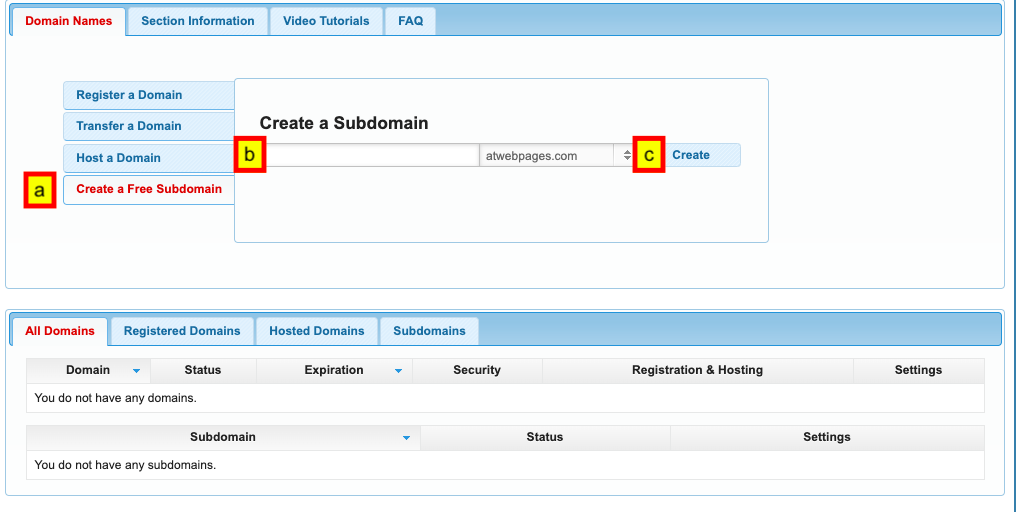
Image 2: creating a subdomain
At the bottom of the page you can now see your subdomain. If you like, you can visit it already by clicking “Open Website” (Image 3 a), but your study has not been uploaded yet, so all you will see is a generic landing page.
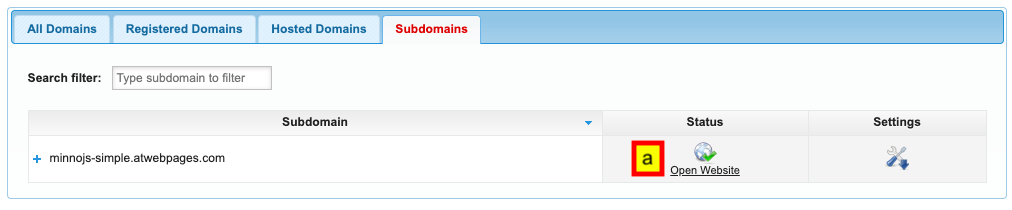
Image 3: the ready subdomain (you will have your own site name here)
Uploading the system files
Now that we’ve created a subdomain for our study, we can start setting up the study.
Studies in the simple server are created simply by uploading files.
We are aiming for a simple directory structure,
with two files at the base directory (index.html, csv.php),
and the study files in a directory of their own (study).
The role of index.html is to activate the study, it is set up to activate the file study/mgr.js.
The role of csv.php is to record data sent from MinnoJS.
You shouldn’t need to edit these files. Just upload and forget.
In order to upload the files, return to the dashboard (image 1 a), and go into the File Manager (image 1 c). You will now see a file explorer containing a single folder with the same name as the subdomain that you created (image 4).
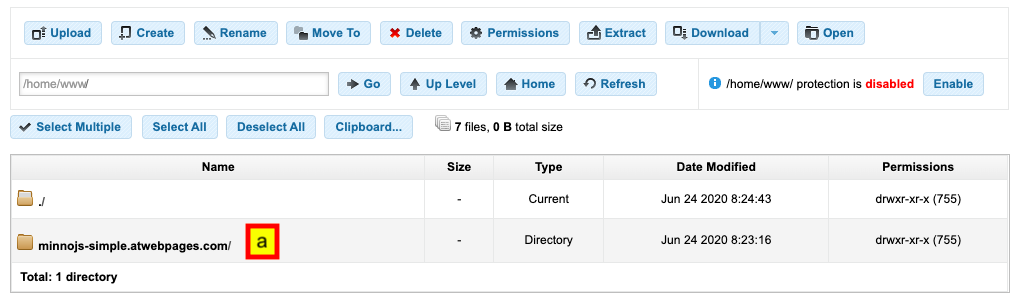
Image 4: the file manager, in the root folder
Double click the folder name to navigate into it and then click “Upload” (image 5 a) in order to start uploading your files. You can drag your files into the box in order to upload them (image 5 b). We first upload index.html, and csv.php. You can find these files in the root directory of simple-minno-server.
Uploading the study files
Next, we create a folder to hold the files of our study. Click “Create” (image 5 c) and create a directory named “study”.

Image 5: the file manager, in the site folder
Finally, double click the “study” directory, click “Upload” again, and upload the study files found in the study directory in the simple-minno-server. Later on, when you work on your own study, you can change these files into your own study files.
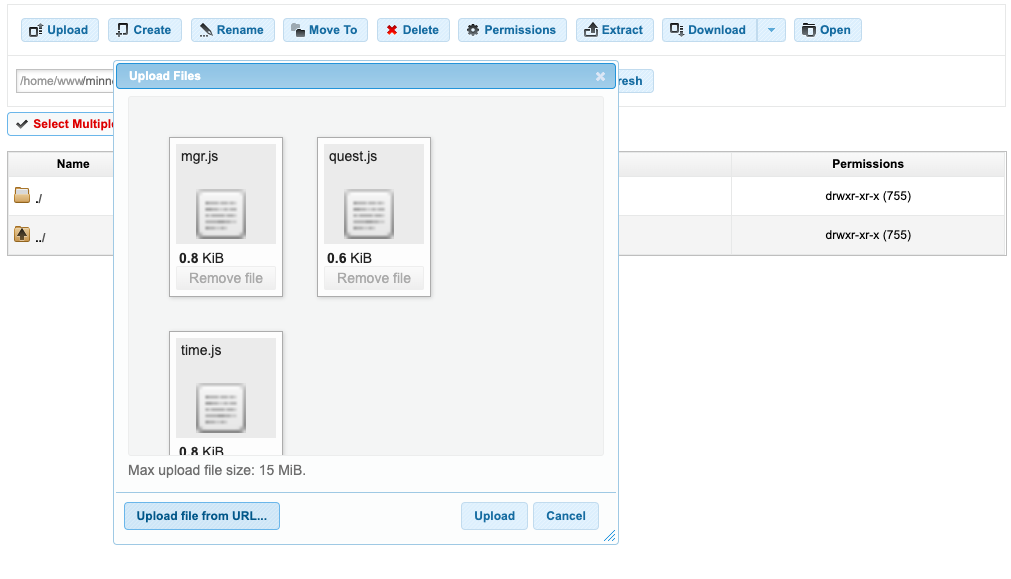
Image 6: the file manager, in the study folder
You can now see my study running at minnojs-simple.atwebpages.com. In order to run your study, you can go back to the dashboard, choose Domain Manager and then click “Open website”. Go ahead, run your study twice or thrice.
Getting the results
You will see that a new folder has appeared in your site folder called “results” (near where you put index.html and csv.php).
This folder is created automatically if it does not exist whenever MinnoJS attempts to save data.
Double click this folder to see two types of files.
There is an .htaccess file that has to do with server permissions.
You can safely ignore it - just leave it there. Each of the other files in this folder is a CSV file with the record for a single participant in you study.
This is basically all you need in order to deploy a study on AwardSpace. The general idea should apply to any php server you deploy to, though the user interface is likely to be a bit different. Experience shows that it is easiest to create new studies by transforming existing ones. You can use the study we created in the current tutorial, or you can use the more involved study in the study.race folder. Try copying its content into the “study” folder and see what happens.
Editing you study
You can edit your files using the “edit” button in the “File Manager”, or by editing it on you computer and re-uploading it. But if you intend to do a lot of editing you might want to start using a program that allows easier communication with the server (i.e. an FTP client. I highly recommend FileZilla).
That’s it really. Go ahead, try it out. It’s easier than it looks.